Table of Contents
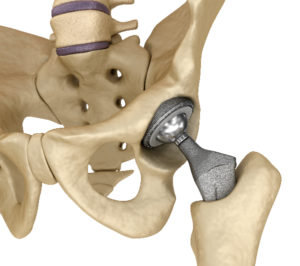
Joint replacement surgeries are becoming more and more prevalent in the United States with increasing age. According to an article titled Prevalence of Total Hip and Knee Replacement in the United States (LINK), around 7 million americans are living with a hip or knee replacement with the prevalence being higher in women than men for both procedures.
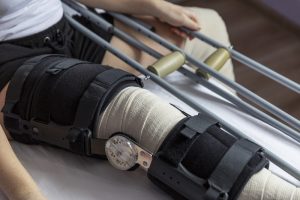
I have treated countless patients in the inpatient rehabilitation setting, with some patients being admitted to rehab as early as 2 days after their hip surgery. Through my experience, I have seen patients make some of the most remarkable recoveries. I can say with all honesty that it is possible to make a full recovery if you decide to pursue this route.
Property of rehaballey.com
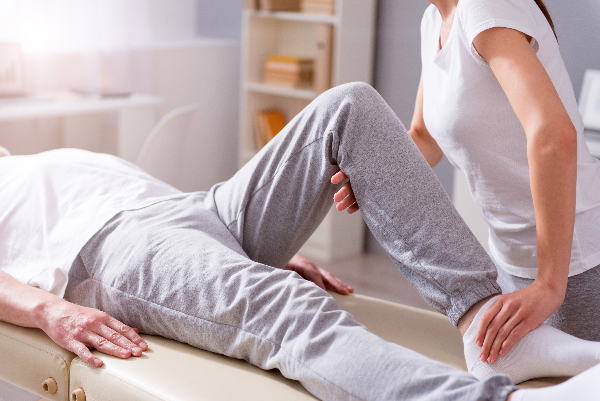
Following basic post-surgical hip protocol such as hip precautions and weight-bearing precautions (LINK), as well as gait training with an assistive device and performing daily exercises, have all contributed to the successes of individuals following hip surgery.
Property of rehaballey.com
Although there are many different types of hip surgeries (discussed in more detail, HERE), most of the exercises performed early after surgery are fairly standard. Depending on the type of surgery and/or precautions prescribed, variations of the exercises may have to be performed.

In this blog, I will be discussing some very generic, basic early intervention bed-level exercises that are generally safe for individuals to perform following their hip surgery. I will also leave a link to these exercises in video format for your reference.
Before we dive into my top 6 bed-level exercises after hip replacement surgery, let’s discuss the benefits of these exercises, and why I prefer bed-level exercises starting out. So without further ado, let’s dive in.
Benefits of Exercising While Lying Down
- Lying down places your body and muscles in a gravity-reduced position. This reduces the force of gravity pulling down on your surgical leg, making the exercises easier to perform as compared to sitting upright or standing.
- Lying down elevates your legs as compared to sitting or standing, which results in a reduction of swelling and less fluid retention in the legs.
- Lying down helps to stretch your hips relieving hip tightness and improving flexibility.
- Lying down helps you perform exercises to the maximal range that you can tolerate, or that is allowed based on hip precautions.
- Alley Tips: For more information on hip precautions and ways to protect your hip after surgery, be sure to check out my blog “10 Ways to Protect Your Hip After Surgery or Acute Injury (LINK)
Recommended Products That Can Assist With Lying Down Exercises
- Leg Lift (LINK)
- A leg lift can be used to assist you with raising your injured/or surgical leg on and off of the bed. Not to mention, leg lifts can also be used to assist you with performing exercises until you gain enough strength to lift your leg without assistance.
- Foam Roller (LINK)
- A foam roller is recommended for short-arc quad exercises listed below. Not only is this item helpful during exercise, but it can also be used to prop the knees for pain relief as well. The 18” long foam roller will work just fine.
- Alley Tips: Do not sleep with a foam roller or bolster under your knees as this reduces hip flexibility and hinders the ability to extend your hips. If you are using the foam roller under your knees for pain relief, make sure to remove the roller before sleeping.
- Ankle weights (LINK)
- Ankle weights can be used on your non-surgical leg for added strength. It is not recommended that you use an ankle weight on your surgical side during the acute phases of healing (usually 0-6 weeks post-surgery).
- Instead, focus on improving your strength and range-of-motion by using the natural weight of your leg. Progressing too fast with weights can increase your chances of injury.
- Once you are cleared of your precautions and can perform exercises through your full range-of-motion without pain, then you can safely progress to using ankle weights on your surgical side. (Usually during the subacute phases of healing after ~6 weeks post-surgery).
- I recommend starting with 2lb ankle weights, however, you can use as much or as little weight as you desire, or can tolerate.
- Cold packs (LINK)
- When starting an exercise routine, it is common to experience increased swelling on your surgical leg. Make sure to ice your leg after exercising to reduce pain and swelling. I recommend these (LINK) ice packs because they contour to the shape of your leg allowing an even distribution of ice. I recommend icing your leg for 15-20 minutes, every 2 hours.
- A regular 11” X 14” cold pack will work just fine.
Helpful Tips Before Starting
- Remove all pillows and bedding items such as sheets, comforters, and blankets as this can impede exercise performance.
- Make sure to have all necessary items within close, easy reach to prevent interruptions during your exercise routine.
- Allow adequate rest breaks between each set of exercises. Break up the sets if you are feeling fatigued.
- It is important that you also exercise your non-surgical leg to maintain strength, range-of-motion, and mobility. If you do not have pain or injury to your non-surgical leg then you can start by adding light ankle weights for added strength.
- Hydration and proper fueling are essential before and after you exercise for adequate performance and recovery. Make sure to drink plenty of water and eat whole, energy-producing foods such as fruits.
- Follow any precautions that your doctor has prescribed, do not start an exercise routine without first notifying and receiving clearance from your doctor and/or evaluating therapist.
- Last but certainly not least, I will typically have my patients perform 20 reps of each exercise followed by a brief rest period. It is best to perform these exercises at least 2 times each day to gain the maximum benefit for hip strength and mobility. Please refer to the disclaimer listed below before starting any of the exercises listed.
DISCLAIMER: By continuing you are agreeing to this disclaimer. Click the link for full disclosure of the disclaimer policy (LINK)
The Exercises
#1 Ankle Pumps


- While lying on your back in bed with your knees straight, slowly bend your ankles up with your toes toward the ceiling, then extend your ankles down with your toes pointing away from the ceiling. I recommend performing this exercise 20 times for 2 sets.
- Goal of Exercise: This exercise assists with lower extremity swelling by using the gastrocnemius (calf muscle) and surrounding muscles as a pump to circulate blood and other fluids from the lower leg.
#2 Heel Slides


- While lying on your back in bed with your knees straight. Slowly slide your heel upwards toward your bottom, then slide your heel back down until your knee is straight. Make sure to keep your knee upright, facing the ceiling during this exercise. Do not allow your knee to fall inward or outward.
- If you’re having difficulty sliding your leg up and down because of weakness or tightness, then use the leg lift listed above to assist with the exercise.
- Goal of Exercise: This exercise helps to increase hip flexor strength targeting the quadricep muscle located on the top of your thigh. This exercise also improves range-of-motion in your hip reducing joint tightness.
#3 Hip Abduction and Adduction
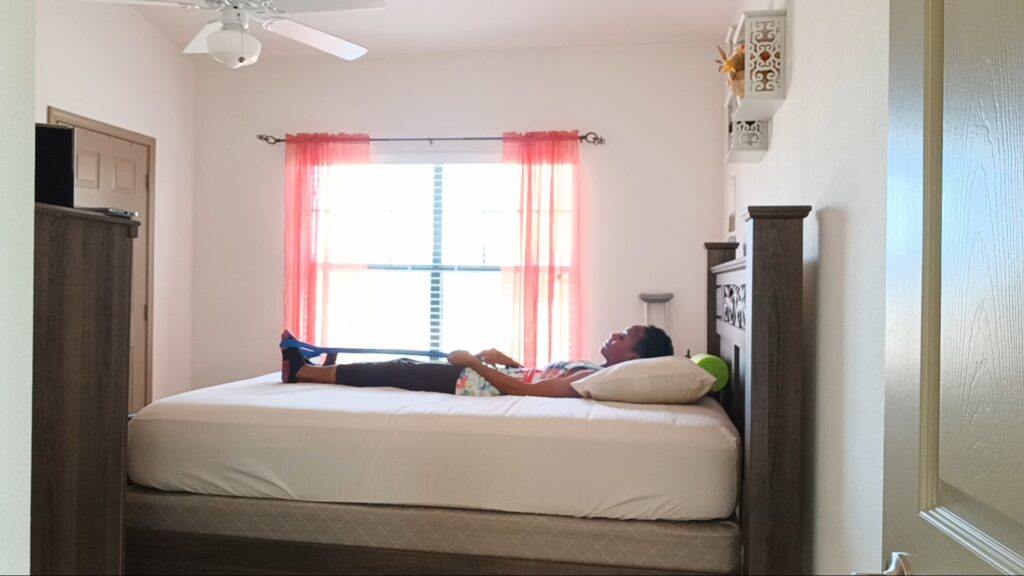

- While lying on your back, knees straight, slowly slide your leg out toward the side of your body, then slowly slide your leg back toward the middle.
- Feel free to use the leg lift listed above if you are having difficulty sliding your leg out to the side due to hip stiffness or muscle weakness.
- Goal of Exercise: This exercise helps to improve the flexibility of your hip joint, as well as increase the strength of the hip abductor muscles on the side of the hip. The muscles on the side of the hip, particularly the gluteus medius assist with keeping the hips aligned while walking and standing. This will also help to improve your ability to be able to get in and out of bed, and into and out of a vehicle.
- Alley Tips: Make sure to know and follow your hip precautions before performing this exercise. Do not allow your hip to pass the center of your body when sliding your leg in. Keep your knees pointed straight up toward the ceiling. Do not allow your leg to twist in and out during this exercise. Note: some surgeons will not allow hip abduction exercises in the early phases of healing.
#4 Quad Sets


- While lying on your back, knees straight, push your knees down toward the bed, holding for a total of 3-5 seconds, then relax.
- This exercise can either be performed using one leg at a time, or both legs at the same time.
- Make sure to keep your knees straight, do not bend your knees up and down during this exercise.
- Goal of Exercise: This exercise is considered an isometric exercise which involves static contractions of the muscle without changing the length of the joint.
- During this exercise, the muscle will contract without the joint moving. This helps to strengthen the quadriceps muscle on the top of the thigh responsible for extending the knee.
- Strengthening this muscle will help with tasks such as sitting and standing from a chair, being able to extend the knee when walking, and having the ability to stand on one leg without the knee buckling or collapsing.
#5 Glut Sets


- While lying on your back, knees can either be straight or slightly bent upwards, squeeze your bottom together holding for a total of 3-5 seconds then slowly relax.
- Make sure to keep your back straight during the exercise. Do not arch your back, or move your bottom up and down off of the bed during this exercise.
- Goal of Exercise: As mentioned in the previous section, this is also an isometric exercise. This exercise targets the gluteus maximus muscle which is responsible for extending the hip joint during tasks such as transferring from sitting to standing, as well as straightening the hip joint during standing and walking activities.
#6 Short Arc Quads
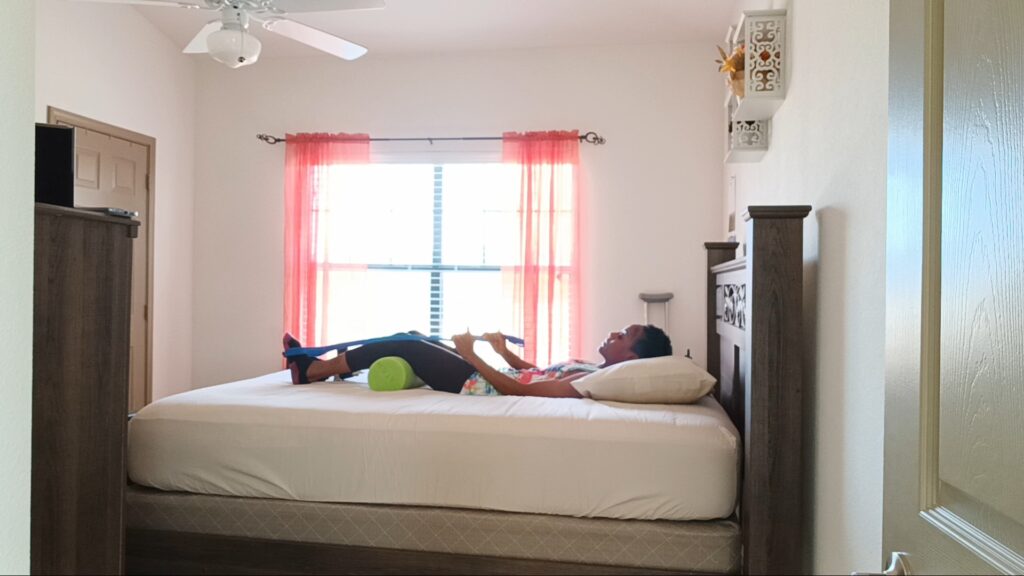

- While lying on your back, place a foam roller under both of your knees. Allow the backs of your knees to rest on the foam roller. Slowly extend the knee by kicking the foot up toward the ceiling, hold for a total of 3-5 seconds, then slowly lower your leg back down toward the bed. Be sure to keep the back of your knees on the bolster the entire time.
- This position is generally one of the most comfortable positions for individuals following hip surgery. Be sure, however, not to sleep with the foam roller under your knees. Refer to the recommended products listed above for further details.
- Goal of Exercise: This exercise also helps to strengthen the quadricep muscles on the top of the thigh like the quad sets listed above. The main difference is that this exercise is not an isometric exercise allowing for the knee joint to bend and straighten.
Click The Video Below To Watch Full Video
Hopefully, these 6 exercises assist you on your road to recovery following hip surgery. It is important to note that the type and intensity of exercise depends on what stage of healing you are currently in.
Property of rehaballey.com
Once your hip gets stronger, exercises can progress to the sitting position, standing position, and dynamic positions involving different plans of movements for neuromotor recovery, as well as added resistance for additional strengthening.
Please refer to my blog titled 10 Ways to Protect Your Hip After Surgery or Acute Injury (LINK) for more details and helpful tips for recovery following hip surgery. Feel free to use my contact page or email crumphs@rehaballey.com for questions and/or concerns. GOD BLESS YOUR ENDEAVORS!!
Resources
- Prevalence of Total Hip and Knee Replacement in the United States. https://www.ncbi.nlm.nih.gov/pmc/articles/PMC4551172/